
Applying for your first visit visa can feel overwhelming — forms, documents, appointments and fees. But broken into clear steps, it’s very manageable. Here’s a simple, step-by-step guide to applying for a visit visa from Pakistan, whatever your destination.

Step 1: Choose your destination and visa type
Start by deciding where you’re going and why — tourism, family visit or business. Each country has its own visit-visa category and rules, so confirm you’re applying for the right one. This decision shapes everything that follows.
Step 2: Check the exact requirements
Every embassy publishes a document checklist. Requirements differ — some countries use online e-Visas, others need appointments and biometrics, and a few require an interview. Knowing the exact list for your destination up front saves you from delays and missing paperwork.
Step 3: Gather your documents
- Valid passport
- Bank statements & proof of funds
- Employment or business proof
- Cover letter
- Flight & hotel bookings
- Invitation & sponsor papers (if any)
This is the heart of your application. Prepare a complete, consistent set of documents, making sure every name, date and figure matches across them. A clean, well-organised file is what earns an officer’s trust.
Step 4: Complete the application form
Fill in the official form carefully and honestly — online for e-Visas and most modern systems, or on paper where required. Double-check every entry, because errors and contradictions here are a common cause of refusal. Take your time and review before submitting.
Step 5: Pay, book biometrics or interview, and submit
Pay the visa fee, then — depending on the country — book a biometrics appointment at the relevant visa centre (such as VFS Global or Tasheer) or a visa interview. Attend on time with your documents, give your fingerprints and photo, and submit your application.
Step 6: Track and collect
After submission, you can usually track your application online. Processing times vary from a few days (many e-Visas) to a few weeks. Once a decision is made, you collect your passport or receive your e-Visa by email — and you’re ready to travel.
- Apply well before your travel date
- Keep copies of everything
- Track your application status
- Only book paid tickets after approval
Frequently asked questions
How early should I apply? Several weeks ahead, more for embassies with long waits. Do I always need an interview? No — many visas are document-based; the US is the main one that interviews. Can you handle the whole process for me? Yes — we guide you from checklist to submission.
With the right preparation, applying for a visit visa is far simpler than it seems. If you’d like us to walk you through every step and prepare your file properly, just reach out.
How long the process takes
Timelines vary widely by destination. Many e-Visas (Malaysia, Thailand, Turkey where eligible) are decided in a few working days. Schengen and UK visitor visas typically take around two to three weeks. The US is different — the visa itself may be quick, but the interview appointment can take months to secure. Always check your destination’s current timeline and apply with plenty of margin before your travel date.
Common beginner mistakes
First-time applicants often trip on the same things: leaving the application to the last minute, submitting an incomplete document set, letting details contradict each other, or buying non-refundable tickets before approval. Avoid these and you’re already ahead of most applicants. When in doubt, follow the official checklist exactly and double-check consistency before you submit.
- Start early, not last-minute
- Submit a complete document set
- Keep every detail consistent
- Book paid tickets only after approval
Planning to travel this year?
Reloaded Visa prepares your complete file and guides you at every step. Free consultation — no obligation.
If you’re visiting family or friends abroad, or travelling for business, an invitation letter — and sometimes a sponsorship — can significantly strengthen your visa application. Many applicants get these documents wrong or leave them incomplete. Here’s how to get them right.

Invitation vs sponsorship
These two are related but different. An invitation letter is written by your host abroad, confirming they’ve invited you and (often) that they’ll provide accommodation. Sponsorship means someone is paying for all or part of your trip — that could be your host, a relative in Pakistan, or a company. A single trip can involve both, one, or neither.
When you need them
An invitation is common for family and friend visits and for business trips (from the inviting company). Sponsorship matters whenever you aren’t fully funding the trip yourself. If you’re a self-funded tourist, you may not need either — but where a host or sponsor is involved, documenting it properly makes your case much clearer.
What an invitation letter should include
- Host’s full name and contact
- Their status / residence proof
- Your relationship to them
- Purpose and dates of your visit
- Offer of accommodation (if any)
- Their signature
The letter should clearly identify the host, prove they legally live in that country (a residence permit, passport copy or similar), explain how they know you, and state when and why you’re visiting. If they’re hosting you, that address becomes your proof of accommodation.
Sponsorship documents
If someone is sponsoring you, their finances must back it up. Include a short sponsorship letter plus the sponsor’s bank statements, proof of income, and identification. The sponsor’s funds then face the same test as your own — they must be steady, sufficient, and clearly theirs.
Tips
- Keep the letter clear and factual
- Attach the host’s status proof
- Include relationship evidence
- Match all details across the file
Frequently asked questions
Does an invitation guarantee a visa? No, but it strengthens a genuine application. Does the invitation need to be notarised? Some embassies prefer it; requirements vary by country. Can a friend sponsor me? Yes, if they provide proper financial documents and proof of your relationship.
A clear, well-documented invitation and sponsorship can make a real difference. If you’d like help preparing or reviewing these documents, we’ll make sure they’re complete and consistent.
Business invitations
For a business visit, the invitation comes from the company you’re dealing with abroad. It should be on official letterhead and state the purpose of your visit (meetings, a conference, training), the dates, and who is covering your costs and accommodation. A strong business invitation, paired with proof of your own employment or business in Pakistan, makes the trip’s purpose clear and credible.
Common mistakes to avoid
The usual errors are an invitation with no proof of the host’s legal status, a relationship that isn’t explained or evidenced, or dates that don’t match the rest of the application. Another is relying on an invitation alone when sponsorship is really needed — remember, an invitation says “you’re welcome,” while sponsorship proves “the money is there.” Cover both where they apply, and keep every detail consistent.
- Use official letterhead (business)
- Attach the host’s status proof
- Explain and evidence the relationship
- Match dates across all documents
Planning to travel this year?
Reloaded Visa prepares your complete file and guides you at every step. Free consultation — no obligation.
Some visas — most notably the US visitor visa — are decided at a face-to-face interview. For many applicants from Pakistan, this is the most nerve-wracking step. The good news: with the right preparation, the interview is very manageable. Here’s how to walk in confident and give yourself the best chance.

Which visas involve an interview?
The US B-1/B-2 visa almost always requires an interview at the US Embassy in Islamabad or Consulate in Karachi. Most UK and Schengen visitor visas are decided on documents and biometrics without a formal interview, though a credibility interview can occasionally be requested. This guide focuses on making any visa interview go smoothly.
Know your own application
The single best preparation is to know your own file inside out. Be ready to explain your purpose of travel, your dates, who is paying, and your ties to Pakistan — job, business, family and property. Your answers should match exactly what you wrote on your DS-160 or application form. Contradictions are what raise doubt.
- Purpose and length of trip
- Who is funding it
- Your job, business or studies
- Family and ties to Pakistan
On the day
Arrive early and dress smartly — first impressions matter. Bring your documents neatly organised, but don’t expect to present a huge file; the officer relies mostly on your answers. Stay calm, listen to each question, and answer honestly and briefly. Long, rehearsed speeches work against you; clear, natural answers work for you.
Common questions to expect
Typical questions include: Why are you travelling? How long will you stay? Who is paying? What do you do for work? Do you have family in the country you’re visiting? Have you travelled abroad before? Think through your honest answers in advance so you can respond naturally and without hesitation.
Do’s and don’ts
- Do arrive early and organised
- Do answer briefly and truthfully
- Do know your finances and ties
- Don’t memorise a script
- Don’t argue or over-explain
- Don’t carry fake documents
Frequently asked questions
How long is the interview? Often just a few minutes — decisions are usually quick. What if I’m nervous? That’s normal; focus on honest, simple answers. Can I take documents? Yes, bring them organised, but the officer may not ask for all of them.
A calm, well-prepared applicant with a genuine story does well at interview. If you’d like help getting interview-ready — from your DS-160 to practising your answers — we’re here to support you.
How to answer well
Good interview answers are short, specific and true. If asked why you’re travelling, don’t ramble — give the real reason in a sentence or two (“I’m visiting my brother in New York for two weeks”). If asked who’s paying, say so plainly and be ready to show it. Confidence comes from knowing your own facts, not from memorising lines. Practising out loud a few times helps you sound natural rather than rehearsed.
After the interview
Decisions are often given on the spot. If approved, you’ll be told your passport will be returned with the visa. Occasionally a case goes into short “administrative processing” for extra checks — this is routine and not a refusal. If you are refused, ask yourself honestly what raised doubt (usually ties or purpose), strengthen that area, and you can apply again with a better-prepared case.
- Keep answers short and specific
- Practise aloud beforehand
- Stay calm if asked follow-ups
- Learn from a refusal and improve
Planning to travel this year?
Reloaded Visa prepares your complete file and guides you at every step. Free consultation — no obligation.
For many destinations — especially the Schengen countries of Europe — travel insurance isn’t optional; it’s a compulsory part of the visa application. Even where it isn’t required, it’s strongly recommended. Here’s a clear guide to getting the right travel insurance for your visa from Pakistan.

Why travel insurance is required
Embassies want to know that if you fall ill or have an accident abroad, you can cover the medical costs without becoming a burden on their health system. Travel insurance guarantees that. For Schengen visas it’s a firm rule; for others it strengthens your file and simply protects you during your trip.
The Schengen requirement
For a Schengen visa, your travel insurance must meet specific minimums: coverage of at least €30,000 for medical emergencies and repatriation, valid across all Schengen countries, and covering your entire stay. The policy certificate is a required document — without it, the application is incomplete.
- Minimum €30,000 medical cover
- Valid in all Schengen states
- Covers your whole trip
- Includes emergency repatriation
How to get it
Travel insurance is easy to arrange in Pakistan — through insurance companies, banks, travel agents, or online providers that issue an instant certificate. You’ll provide your travel dates and destination, choose a plan that meets the requirement, and receive a policy document to submit with your application. It’s usually one of the more affordable parts of the whole process.
Other destinations
Countries like the UK, USA, Canada and Australia don’t always demand insurance as a visa condition, but including it shows preparedness — and travelling without cover is a real risk. Some countries (and airlines) may ask for it on arrival. For peace of mind and a stronger application, insurance is always a wise choice.
Tips
- Choose a policy that meets the exact rules
- Keep the certificate handy for travel
- Check the coverage amount and region
- Buy for the full trip duration
Frequently asked questions
Is insurance mandatory for all visas? It’s mandatory for Schengen and recommended for most others. How much does it cost? It varies by age, duration and cover, but it’s typically modest. When should I buy it? Before you apply for Schengen (the certificate is needed); for others, before you travel.
Choosing insurance that meets the exact requirements avoids a simple but costly refusal. If you’d like help selecting the right policy for your destination, we’re happy to guide you.
Insuring a family or group
Travelling with your spouse and children? Each traveller needs their own valid cover, though many providers offer convenient family or group policies that insure everyone under one certificate. Make sure every member’s name appears correctly and that the coverage amount meets the requirement per person — especially for Schengen, where the €30,000 minimum applies to each traveller.
Beyond Schengen
While Schengen makes insurance compulsory, it’s genuinely worth having for any trip. Medical care abroad can be extremely expensive, and a good policy also covers things like trip cancellation, lost baggage and emergencies. For destinations that don’t require it, a modest policy still protects you — and shows the embassy you’ve planned responsibly. Read what each plan actually covers before you buy, not just the headline price.
- One valid cover per traveller
- Check per-person coverage limits
- Look beyond price to what’s covered
- Keep the certificate for your trip
Planning to travel this year?
Reloaded Visa prepares your complete file and guides you at every step. Free consultation — no obligation.
Almost every visit-visa application asks for proof of your flight and hotel bookings — but here’s the mistake many people make: they buy expensive, non-refundable tickets before the visa is even approved. There’s a smarter, safer way. Here’s how to arrange your travel bookings correctly for a visa application from Pakistan.

Why embassies ask for bookings
Your flight and hotel bookings show the officer three things: that your trip is real and planned, the exact dates you’ll be in the country, and — crucially — that you intend to return home. A confirmed round-trip itinerary is quiet but powerful evidence that you’re a genuine visitor, not someone planning to overstay.
Flights: reserve, don’t buy (yet)
You generally do not need a fully paid ticket to apply. What you need is a flight reservation or itinerary showing your name, route and dates. You can get this through an airline’s hold-booking option, a travel agent, or a refundable fare. Only buy the actual ticket once your visa is approved — that way, if there’s a delay or refusal, you haven’t lost a large sum.
- Use a flight reservation / itinerary
- Show a round trip (with return)
- Match dates to your cover letter
- Buy the real ticket after approval
Hotels: book refundable rooms
For accommodation, book hotels with free cancellation (widely available on sites like Booking.com). This gives you a confirmed booking to submit, with no risk if plans change. If you’re staying with family or friends, you usually don’t need a hotel — instead, include an invitation letter and their address, which serves as your proof of accommodation.
Keep everything consistent
Your booking dates must match the travel dates in your application form, cover letter and (if relevant) invitation. If your cover letter says 10–20 August but your hotel booking says 12–22 August, that inconsistency creates doubt. Line them all up before you submit.
Tips for a clean travel plan
- Plan realistic, sensible dates
- Include arrival and departure
- Keep bookings refundable until approval
- Carry copies for the airport too
Frequently asked questions
Do I need to pay for flights before applying? No — a reservation or itinerary is usually enough; pay after approval. What if I’m staying with family? Use their invitation and address instead of a hotel booking. Can I cancel after getting the visa? You should genuinely travel as planned; frequent mismatches between bookings and travel can cause problems later.
Getting your bookings right protects both your application and your money. If you’d like help arranging proper flight and hotel documentation for your visa, we can guide you through it.
Multi-city and connecting trips
If your journey has connections or covers more than one country, make your itinerary tell a clear, logical story. Show each leg with dates and cities so the officer can follow your route from arrival to departure. For a Schengen trip that visits several countries, remember you apply through the embassy of your main destination (where you’ll spend the most time) — and your bookings should reflect that plan.
At the airport
Even after your visa is approved, keep printed or digital copies of your confirmed flight and hotel bookings for the journey. Immigration officers on arrival sometimes ask to see your return ticket and accommodation, so having them ready makes entry quick and stress-free. Treat these documents as part of your travel kit, not just your visa file.
- Show a clear, logical route
- Apply via your main destination (Schengen)
- Carry booking copies when you fly
- Keep return proof accessible
Planning to travel this year?
Reloaded Visa prepares your complete file and guides you at every step. Free consultation — no obligation.
Every year, thousands of visa applications from Pakistan are refused — and the frustrating truth is that most refusals are avoidable. They rarely come from bad luck; they come from the same handful of mistakes, repeated again and again. Learn what they are, and you put yourself firmly on the side of the applicants who get approved.

The top reasons applications are refused
Across the UK, Schengen, US and other embassies, the causes of refusal are strikingly similar. Recognise them, and you can design your application to avoid every one.
- Weak or unstable finances
- Large, unexplained deposits
- Poor evidence of ties to home
- Inconsistent or contradictory information
- Incomplete or missing documents
- A vague or generic cover letter
1. Fix your finances first
Show a natural six-month bank history with a sensible balance and clear income — not a one-off deposit made days before applying. If a large amount entered your account legitimately, prove where it came from. Believable money is convincing money.
2. Prove you’ll return
The officer’s core fear is that you won’t come back. Counter it directly with strong ties — job, business, property and family — each backed by a document. This single step addresses the most common reason for refusal.
3. Keep everything consistent
Contradictions destroy trust. Your name, dates, employer, sponsor and amounts must match across your form, cover letter, bank statement and bookings. Before submitting, read your whole file as if you were the officer, and fix anything that doesn’t line up.
4. Submit a complete, tailored file
Missing documents and copy-paste cover letters signal a careless application. Follow the exact checklist for your destination, include everything requested, and write a cover letter specific to your trip. Attention to detail tells the officer you are serious and genuine.
What to do if you’ve already been refused
A refusal is not the end. Read the refusal reasons carefully, fix the real weakness — usually finances, ties or consistency — and reapply with a stronger file. Simply resubmitting the same application will get the same result, so the improvement has to be genuine. Many people succeed on a second, better-prepared attempt.
- Understand the exact refusal reason
- Strengthen the weak area
- Rebuild a consistent, complete file
- Reapply when genuinely ready
Frequently asked questions
Can I reapply immediately after a refusal? Usually yes, but only once you’ve fixed what caused it. Does one refusal ruin my chances forever? No — a well-prepared fresh application can still succeed. What’s the single biggest factor? Proving you’re a genuine visitor with strong ties and honest finances.
Avoiding refusal is really about preparation and honesty. If you’d like your application reviewed before you submit — or help rebuilding after a refusal — we’re here to give you the strongest possible chance.
Country-specific notes
The core mistakes are universal, but each system has its own emphasis. The UK weighs the overall genuine-visitor picture and is strict on finances and ties. Schengen consulates are exacting on precise documents — travel insurance, confirmed bookings and a clear day-by-day purpose. The US decides at an interview under Section 214(b), so how you present yourself in person matters as much as your papers. Tailoring your file to the specific embassy is a simple way to avoid an easy refusal.
Build a refusal-proof checklist
Before you submit, run through a final review as if you were the visa officer. Are your finances steady and explained? Are your ties documented? Does every date, name and amount match across the whole file? Is the cover letter specific to this trip? Is anything on the official checklist missing? Catching these yourself, in advance, is exactly what prevents the most common refusals.
- Finances steady and explained
- Ties clearly documented
- Every detail consistent
- Cover letter tailored
- Nothing missing from the checklist
Planning to travel this year?
Reloaded Visa prepares your complete file and guides you at every step. Free consultation — no obligation.
Almost every visit-visa decision comes down to one question: are you a genuine visitor who will return home when your trip ends? The way you answer it is by proving your ties to Pakistan. Strong, well-documented ties are the single most important factor in most approvals. Here is how to show them convincingly.

What “ties to home” actually means
Ties are the commitments and roots that give you strong reasons to come back to Pakistan. Officers look for a life here that you would not simply abandon — a career, a business, family responsibilities, property and financial roots. The more of these you can show, the more confident the embassy is that you’ll return, and the stronger your application becomes.
The main types of ties
- Employment or a running business
- Property and assets
- Close family in Pakistan
- Financial roots (accounts, investments)
- Ongoing studies or commitments
No one needs all of these, but the goal is a clear picture of a settled life. A stable job, a business you own, a home, dependent family members, and a healthy local bank presence all pull in the same direction: you have every reason to return.
How to document each tie
Evidence beats assertion. For employment, include a letter from your employer stating your position, salary and approved leave, plus recent salary slips. For a business, provide registration documents, tax records and bank activity. For property, include ownership papers. For family, show your Family Registration Certificate and dependents’ documents. Each paper turns a claim into a fact.
If your ties feel weak
Students, homemakers, and young or unemployed applicants sometimes worry they have “nothing to show.” You often have more than you think. A student can show enrolment and upcoming exams. A homemaker can show family ties, a sponsoring spouse, and dependent children. Others can lean on property, family responsibilities and a sponsor. The key is to present whatever genuine ties you have clearly, and to pair them with a strong sponsor where needed.
- Students: enrolment & return-to-study proof
- Homemakers: family & spouse sponsorship
- Retired: pension, property, family
- Everyone: a clear reason to return
Frequently asked questions
Which tie is most important? There’s no single one — a combination is strongest, but stable employment or a business plus family usually carries the most weight. I’m unemployed — can I still qualify? Yes, especially with a solid sponsor and other genuine ties. Do ties guarantee approval? Nothing guarantees a visa, but strong, documented ties are the biggest factor in your favour.
Presenting your ties well is often what separates an approval from a refusal. If you’d like help identifying and documenting your strongest ties to Pakistan, we can guide you through exactly what to include.
How officers assess your ties
An officer weighs your ties as a whole, asking a simple question: does this person have more reason to return than to stay away? Someone running a business, supporting a family and owning property has a great deal anchoring them at home. The assessment is about the overall picture, not a single perfect document — so aim to show breadth as well as depth, and make sure each claimed tie is backed by evidence.
Strengthening weak ties over time
If your ties feel thin today, some can be built up before you apply. Formalising your employment, registering a business, maintaining a steady bank account, or documenting property and family responsibilities all add weight. Even a few months of consistent, verifiable activity can noticeably improve how settled and genuine you appear. Think of it as gradually strengthening the roots that show you belong at home.
- Get a formal employment letter
- Keep steady financial activity
- Document property & assets
- Gather family & dependant proofs
Planning to travel this year?
Reloaded Visa prepares your complete file and guides you at every step. Free consultation — no obligation.
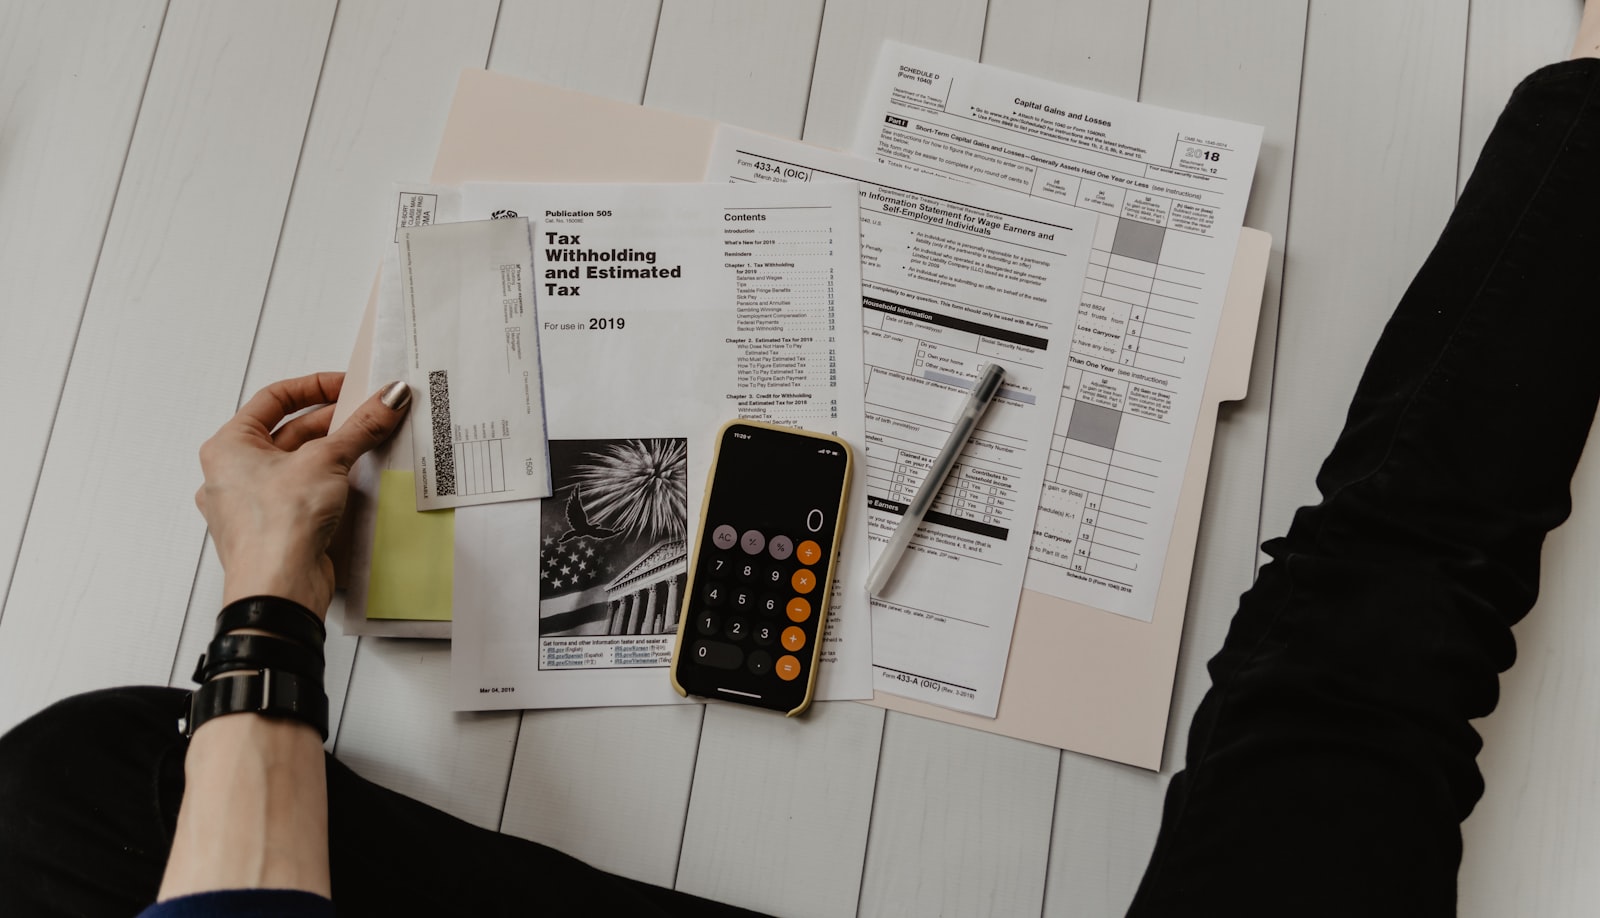
When a visa is refused, weak or unconvincing finances are one of the most common reasons. Embassies need to see that you can comfortably pay for your trip and that your money is genuinely yours. Here is how to prepare your bank statements and proof of funds the right way, so your finances strengthen your application instead of raising doubts.
Why funds matter so much
A visa officer wants reassurance that you won’t run out of money abroad or need to work illegally. Your financial documents answer that. But they do more — a steady, natural bank history also signals stability and ties to home, which supports the whole “genuine visitor” picture. Money that appears out of nowhere does the opposite.
How much is enough?
There is no single magic number. The right amount depends on your destination, the length of your trip, and who is paying. As a rule, you should show enough to cover flights, accommodation, daily expenses and a sensible buffer — plus evidence of regular income behind it. It is not just the balance on one day that matters, but the pattern over time.
What to prepare
- Bank statements (last 6 months)
- Salary slips or income proof
- Business documents (if self-employed)
- Tax records where available
- Property or asset papers
- Sponsor’s documents (if sponsored)
Your core document is usually a six-month bank statement, stamped by the bank. Alongside it, salary slips, an employment letter, or business income and tax records explain where the money comes from. Property and savings add depth. Together they tell a consistent financial story.
If someone is sponsoring you
Being sponsored — by a relative abroad or in Pakistan — is perfectly acceptable, but it must be documented. Include a sponsorship letter, the sponsor’s bank statements and proof of income, and evidence of your relationship. The sponsor’s finances then need to meet the same test: steady, sufficient and clearly theirs.
Tips for strong financials
- Keep 6 months of natural activity
- Maintain a healthy closing balance
- Explain any large transactions
- Match funds to your travel budget
- Use official, bank-stamped statements
The goal is believability. Regular salary credits, normal spending, and a reasonable balance look far more convincing than a suddenly inflated account. Start preparing a few months early so your statement reflects a genuine, stable pattern.
Frequently asked questions
Do I need to freeze money in my account? No — you need genuine, available funds, not a one-day show balance. Can I use my parents’ account? Yes, as a sponsor, with their documents and proof of relationship. Are digital statements accepted? Usually yes, if they are official and bank-verified — a stamped copy is safest.
Getting your finances presented correctly can be the difference between approval and refusal. If you’d like us to review your bank statements and proof of funds before you apply, we’ll make sure they’re as strong as possible.
Special cases: students, homemakers and retirees
Not everyone has a salary account, and that’s fine. A student usually relies on a parent as sponsor, so the parent’s statements and income take centre stage. A homemaker is typically sponsored by a spouse, whose finances are then the focus. A retired applicant can show pension income, savings and property. In each case, the principle is the same: someone must clearly and genuinely be able to fund the trip, with documents to prove it.
How far ahead to prepare
Because officers look at your last several months, the best time to start is before you need to travel — ideally three to six months out. Let your account reflect its normal rhythm of income and spending. Avoid the temptation to borrow a large sum to inflate the balance just before applying; a modest but genuine account almost always beats a suspiciously large one. Preparation, not last-minute topping up, is what builds a believable financial profile.
- Start 3–6 months early
- Keep income landing normally
- Avoid last-minute large deposits
- Save proof for any big transaction
Planning to travel this year?
Reloaded Visa prepares your complete file and guides you at every step. Free consultation — no obligation.
A strong cover letter — sometimes called a letter of purpose or invitation cover — is one of the most powerful documents in a visa application, and one of the most overlooked. It is your chance to speak directly to the visa officer, tie all your documents together, and explain, in plain language, exactly why you should be trusted as a genuine visitor. Here is how to write one that helps get you approved.

Why the cover letter matters
Visa officers review hundreds of files. A clear cover letter makes yours easy to understand and quick to trust. It answers the questions running through the officer’s mind before they have to go looking: Who is this person? Why are they travelling? Can they afford it? Will they come back? When those answers are laid out simply and match your supporting documents, your whole application feels credible.
What to include, step by step
A good cover letter is short — usually one page — and follows a logical order. Cover these points:
- Your full name and passport details
- The purpose of your trip
- Exact travel dates and duration
- Your itinerary and where you’ll stay
- How the trip is being funded
- Your ties to Pakistan
- A clear promise to return
Open by introducing yourself and stating the visa you’re applying for. Then explain your purpose — tourism, a family visit, or business — with any relevant detail (an event, an invitation, a conference). Give your dates and a brief itinerary, state clearly who is paying for the trip, and finish by describing what you are coming back to: your job or business, your family, your home.
A simple structure that works
Think of it in five short paragraphs: introduction, purpose, travel plan, finances, and ties plus your commitment to return. Keep each paragraph to a few sentences. You are not writing an essay — you are making it effortless for the officer to say yes.
Do’s and don’ts
Do keep it honest, specific and professional. Do sign and date it. Do tailor it to your actual trip. Don’t exaggerate, don’t copy a generic template word-for-word, and don’t beg or over-explain. Confidence and clarity read far better than desperation.
- Do keep it to one page
- Do use simple, honest language
- Do match every detail to your file
- Don’t use an obvious template
- Don’t include false claims
- Don’t leave the purpose vague
Common mistakes to avoid
The most frequent errors are vagueness (“I want to visit for some days”), inconsistency with the rest of the file, and an emotional tone that pleads rather than informs. Another is forgetting the most important line of all — a clear statement that you will return to Pakistan at the end of your visit, and why. That single sentence, backed by evidence, addresses the officer’s biggest concern head-on.
Frequently asked questions
Is a cover letter compulsory? Not always, but it is highly recommended — it can only strengthen a genuine application. Should it be handwritten or typed? Typed, printed and signed looks most professional. How long should it be? One page is ideal; two at most for complex cases.
A great cover letter turns a pile of documents into a clear, believable story. If you’d like us to draft or review your cover letter and make sure it matches the rest of your file, we’re here to help.
A sample opening you can adapt
You don’t need fancy language — just clarity. An opening might read: “I am writing to apply for a visitor visa to [country] to [visit family / for tourism / attend a business meeting] from [date] to [date]. My name is [full name], holder of Pakistani passport number [xxx], and I work as [job] at [employer] in [city].” From there you move into purpose, itinerary, funding and ties. Keep the tone calm and factual throughout, and always write in the first person.
Tailor it to your visa type
A tourism letter focuses on your itinerary and what you plan to see. A family-visit letter names your host, their status in the country, and your relationship. A business letter references the inviting company, the meeting or event, and who is bearing the costs. Matching the letter to your real purpose — and to the invitation or bookings in your file — makes it far more convincing than a one-size-fits-all note.
- Tourism: itinerary & highlights
- Family: host details & relationship
- Business: company, event & costs
- All: dates, funding & return plan
Planning to travel this year?
Reloaded Visa prepares your complete file and guides you at every step. Free consultation — no obligation.
A Schengen visa is a short-stay (Type C) visa that allows you to travel freely across all Schengen countries — including France, Germany, Italy, Spain, the Netherlands and more — for up to 90 days in any 180-day period. For Pakistani travellers, preparation is everything. Here is the complete checklist.
Which country should you apply to?
Apply through the embassy or authorised visa centre (VFS/BLS/TLScontact) of the country where you will spend the most days, or your main destination if the stay is equal. Applying to the wrong country is a common cause of refusal.
Required documents
- Passport valid at least 3 months beyond your return, with 2+ blank pages
- Completed and signed Schengen application form
- Two recent photographs (per Schengen specifications)
- Travel medical insurance with minimum €30,000 cover (mandatory)
- Confirmed round-trip flight reservation
- Hotel bookings or invitation with accommodation proof for the whole trip
- Day-by-day travel itinerary
- Bank statements (last 6 months) and proof of sufficient funds
- Employment letter / NOC or business documents
- Property/asset documents and family ties to Pakistan
- Cover letter explaining your travel plans
Important note on ETIAS
You may have heard about ETIAS, the upcoming European travel authorisation. ETIAS is only for visa-exempt nationalities — Pakistani passport holders are not covered and still need a full Schengen visa. Don’t be misled by websites suggesting otherwise.
How long does it take?
Standard processing is usually 15–30 working days, but it can be longer in peak season. Always apply at least 3–4 weeks before travel, and never book non-refundable tickets before approval.
Need help with your Schengen visa application?
Reloaded Visa prepares your complete file and guides you at every step. Get a free consultation today.